
Well, okay, so you won't really save that much unless you have always wanted to buy a random light but never had the budget for it. What is a random light, you ask? Well, let me explain!
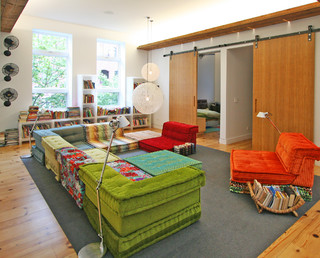
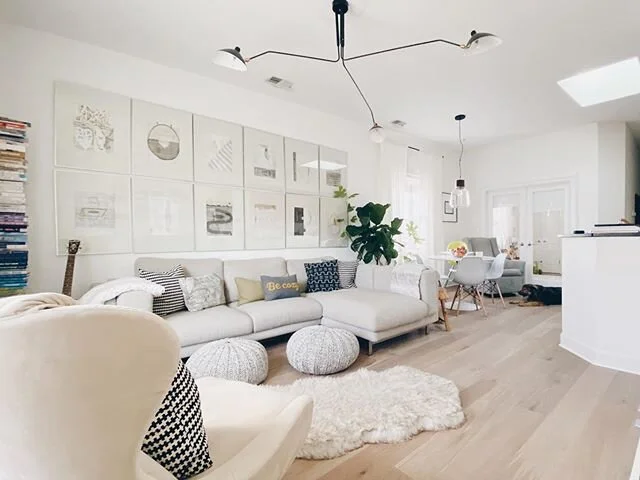
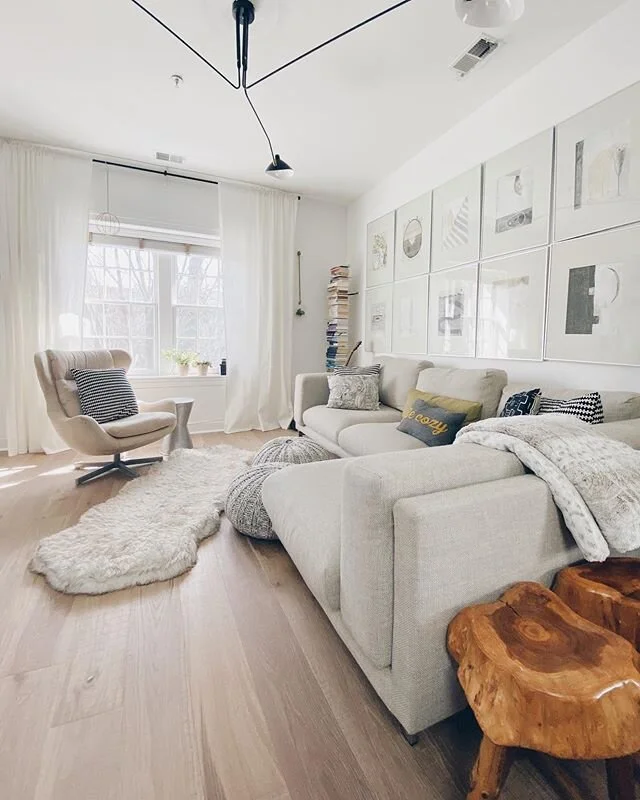
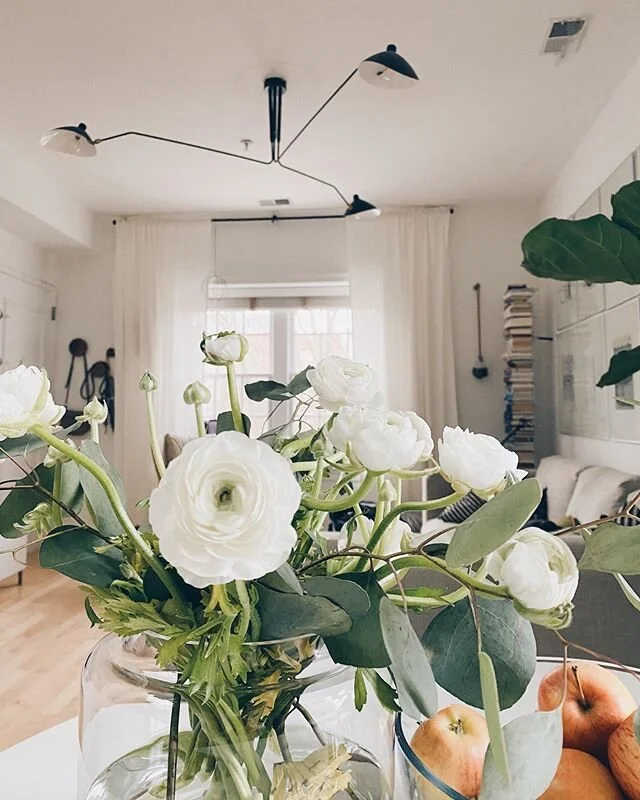
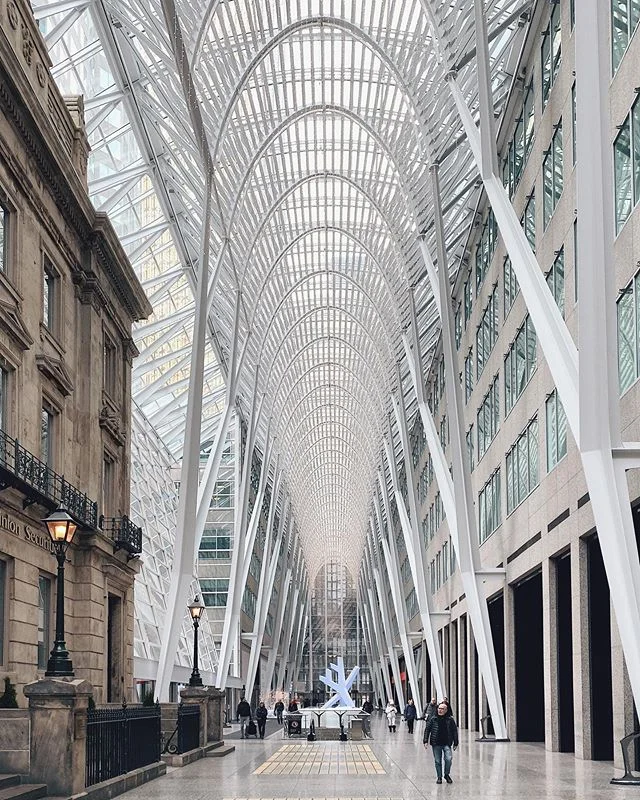
The random light was designed by Bertjan Pot and it has been in the moooi collection since 2002. I have been in love with it since 2010. But that was only because it took me 8 years to discover it. Typically, designers use these lights in large spaces in groupings of 3 or more because they provide a very sculptural design element to tall ceilings and lofts. Here's some evidence:
The light comes in three sizes and two colors: small, medium and large and black and white. And, surprisingly, the process for the real light is not very different from the process of the DIY version: a resin drained yarn is randomly coiled around an inflatable beach ball creating a translucent 3D fabric. The beach ball is then deflated and extracted from a round opening in the lamp. Sounds simple, right?
Well, it is and it isn't. Let me explain.
First, for the record, this is version 4.0 for me. Version 1.0 and 2.0 did not succeed because I did not use the correct materials and did not have the patience to finish respectively. 3.0 was a fantastic light that was well loved for a good 5 years. Unfortunately, it met its early demise in transportation to DC. Which brings us to version 4.0! This version had its own challenges, mostly, due to our new location and my lack of desire to drive anywhere... I wanted to make this light entirely with materials bought on Amazon. And surprisingly, this actually worked!
Here's what you'll need (for a total of $66.88!!)
- Lily Sugar 'N Cream Yarn, 14 Ounce Cone, White, Single Ball: $9.78 (1x)
- Roman 011301 PRO-838 1 gal Heavy Duty Wallpaper Adhesive, Clear: $19.14 (1x)
- Westinghouse Lighting 7028600 Single-Light Mini-Pendant Kit with White Finish: $14.97 (1x)
- Vaseline Petroleum Jelly, Original 13 oz, Pack of 3 (you only need 1 though): $14.00 (1x)
- Sol Coastal Jumbo Classic Rainbow Inflatable 6-Color Beach Ball 36": $8.99 (1x)
As you will notice, I picked a ball that is 36" in diameter because I estimated that to be the size that would fit best in our breakfast nook. You can choose as big or as small of a ball as you'd like. I had actually purchased a 42" ball originally, but then realized that this light fixture will end up being larger than the dining table under it...
Next disclaimer? This is one MESSY process. Wear something you won't be upset about ruining, and do it in an area you won't be upset about messing up. I did this in our tiny back patio.
Here are the steps you will need to take:
- Inflate beach ball.
- Using a sharpie, draw a circle towards the top with a diameter of about 5" or so.
- Cover thoroughly in vaseline.
- Open wallpaper adhesive (in lieu of resin).
- Open yarn roll (but do not unroll).
- Submerge said yarn roll in wallpaper adhesive bucket.
- Hang greased beach ball from a high place (I used the cable that holds our string lights).
- IMPORTANT: Put on gloves.
- Start coiling soaked yarn around ball in random patterns.
- Avoid coiling over your drawn circle. This is the opening you will use to extract the deflated beach ball and change the light bulb later.
- NOTE: The first few rounds that set the foundation are the hardest. Once you have a few layers, it becomes a repetitive and rather easy process.
- ANOTHER NOTE: This glue holds very well so do not stress if the yarn is not stretched tightly around the ball. It will still hold its shape when it's dry.
- Put as many layers as you would like. I liked mine tightly packed because it serves as a better light diffuser that way. But you don't have to make it as tight. I used the entire yarn ball and all of the glue for 4.0.
- Let dry for at least 24 hours, or maybe more. This depends on your humidity. The more humid it is, the more time it will take to dry. This one dried in about 24 hours. And it was bone dry by that time.
- Deflate beach ball.
- Attach light kit (I was surprised to see that the small opening on top where I had attached the ball to hang it was stiff enough to hold the light kit without losing the light's round shape!).
- IMPORTANT: Turn off electricity.
- Install light fixture at the height you would like, which will depend on your ceiling height. Our ceilings are at least 11 ft high and I therefore installed this at about 40" above the table.
- Turn electricity back on and enjoy your magical new feature!
And this is it! A couple of hours of elbow grease and a few thousand dollars saved later, you will feel as accomplished as ever!


A few months back, a co-worker of mine convinced me to join my company's Spartan Race team. He didn't talk it up much: he mentioned it's a long-ish run with a few fun obstacles. You know, no big deal. Something someone who runs as much as me should complete more than easily (read, you don't really need to train for it). Ha ha ha.